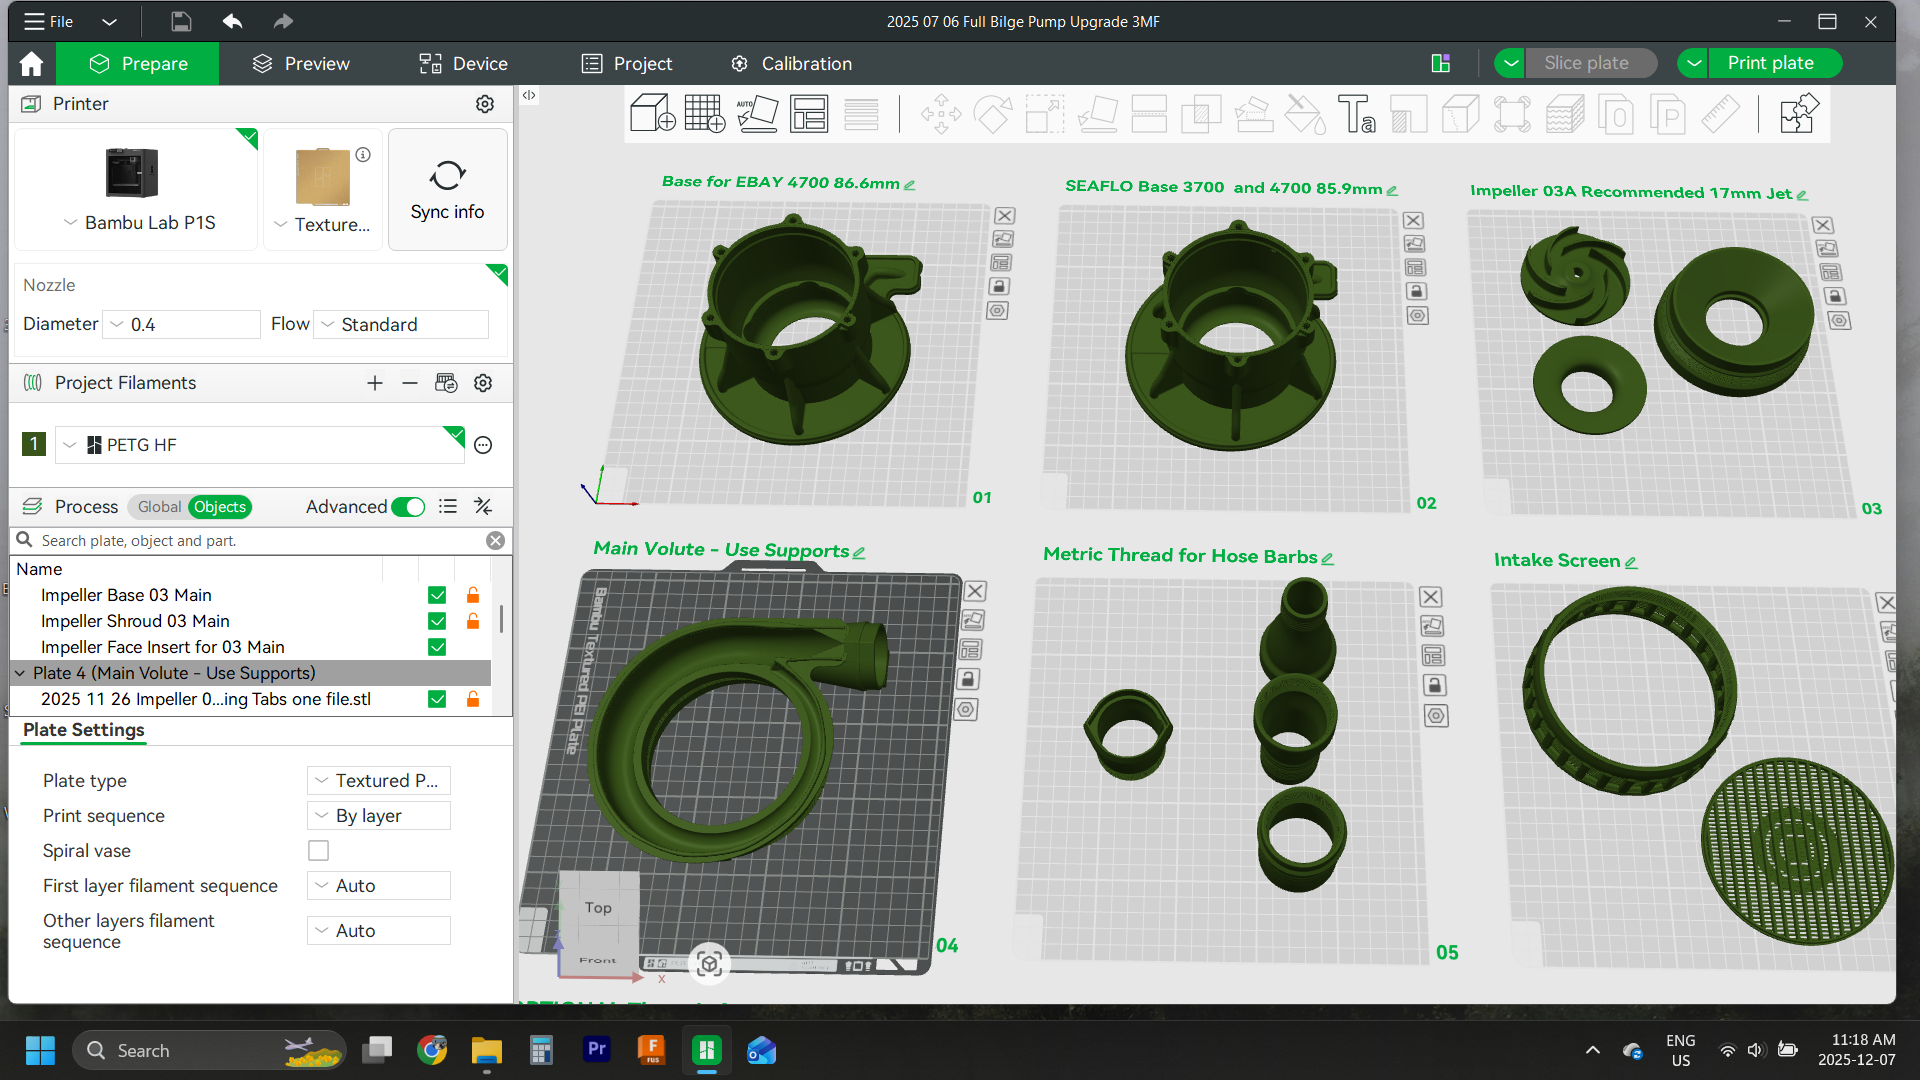
Bilge Pump Full Upgrade 3000GPH to 4700GPH

$35.00

This pump file should fit most bilge pumps this size, but all manufacturers can be slightly different. I have a link to a free download you can try to test fit if this product will fit on your specific bilge pump:

https://drive.google.com/file/d/1uergUq1_au4qVjzJ8SGZYoK0Xdw9ueFK/view?usp=drive_link

This product is tested it to fit on a Seaflo 3700GPH AND a Seaflo 4700GPH bilge pump. The 4700 motor spins a bit faster and will produce the best results. I also tested an unbranded 4700GPH pump sold on eBay.com.au by yc-shopper.

Print this out of solid plastic, and use a medium or thick CA glue liberally to assemble it. Always test fit before gluing.

For the full explanation of this pump, please watch my YouTube video here: https://youtu.be/2jcfdqNjjiw

I will try to add more details and better pictures at some point, but for now, here it is!

Thank you for supporting my work by downloading this digital file from UtmostOutdoors.com

Licensing: This 3D file is licensed for personal use only; no redistribution or commercial sale of printed objects is permitted without explicit permission.

Assembly Instructions:

When you upgrade your bilge pump, you will need a screwdriver (#2 Phillips + shape) and a pair of needle nose plyers for the snap ring on the impeller. 

Start by removing the 6 screws holding the casing together and remove the original base, once the base is exposed, carefully unclip the snap ring by placing one side of the plyers on the shaft, and the other on the tip of the snap ring, then squeeze to slide the snap ring off.  You may need to alternate pulling each tip of the snap ring until is slides off.  Careful not to loose this small part.  Once the ring is removed, you can pull the old impeller up and off.  I recommend sliding your new impeller on and off a couple times to before assembling the pump to loosen up the fit for easier assembly once the new casing is installed.  To install the new casing, you will need to orient it the correct way, as there are two little bumps by two of the 6 screws that need to be aligned.  Ensure everything is lined up correctly and screw back in the 6 screws and your base should be installed.  Once the base is carefully tightened up (don't over torque the screws into the plastic) you should be ready to slip on the impeller, and then snap back on that snap ring (Carful not to forget the snap ring) and then thread in the center velocity stack and then the intake screen.

If you run any sort of extension wires between the pump and your battery, use high quality wires to make sure you get maximum power.  The pump can draw over 20 amps, so it's important not to use long lengths of thin wires where you can avoid it.

Thank you for using my pump upgrade, I hope it helps you find lots of gold!