 Image 1 of 7
 Image 2 of 7
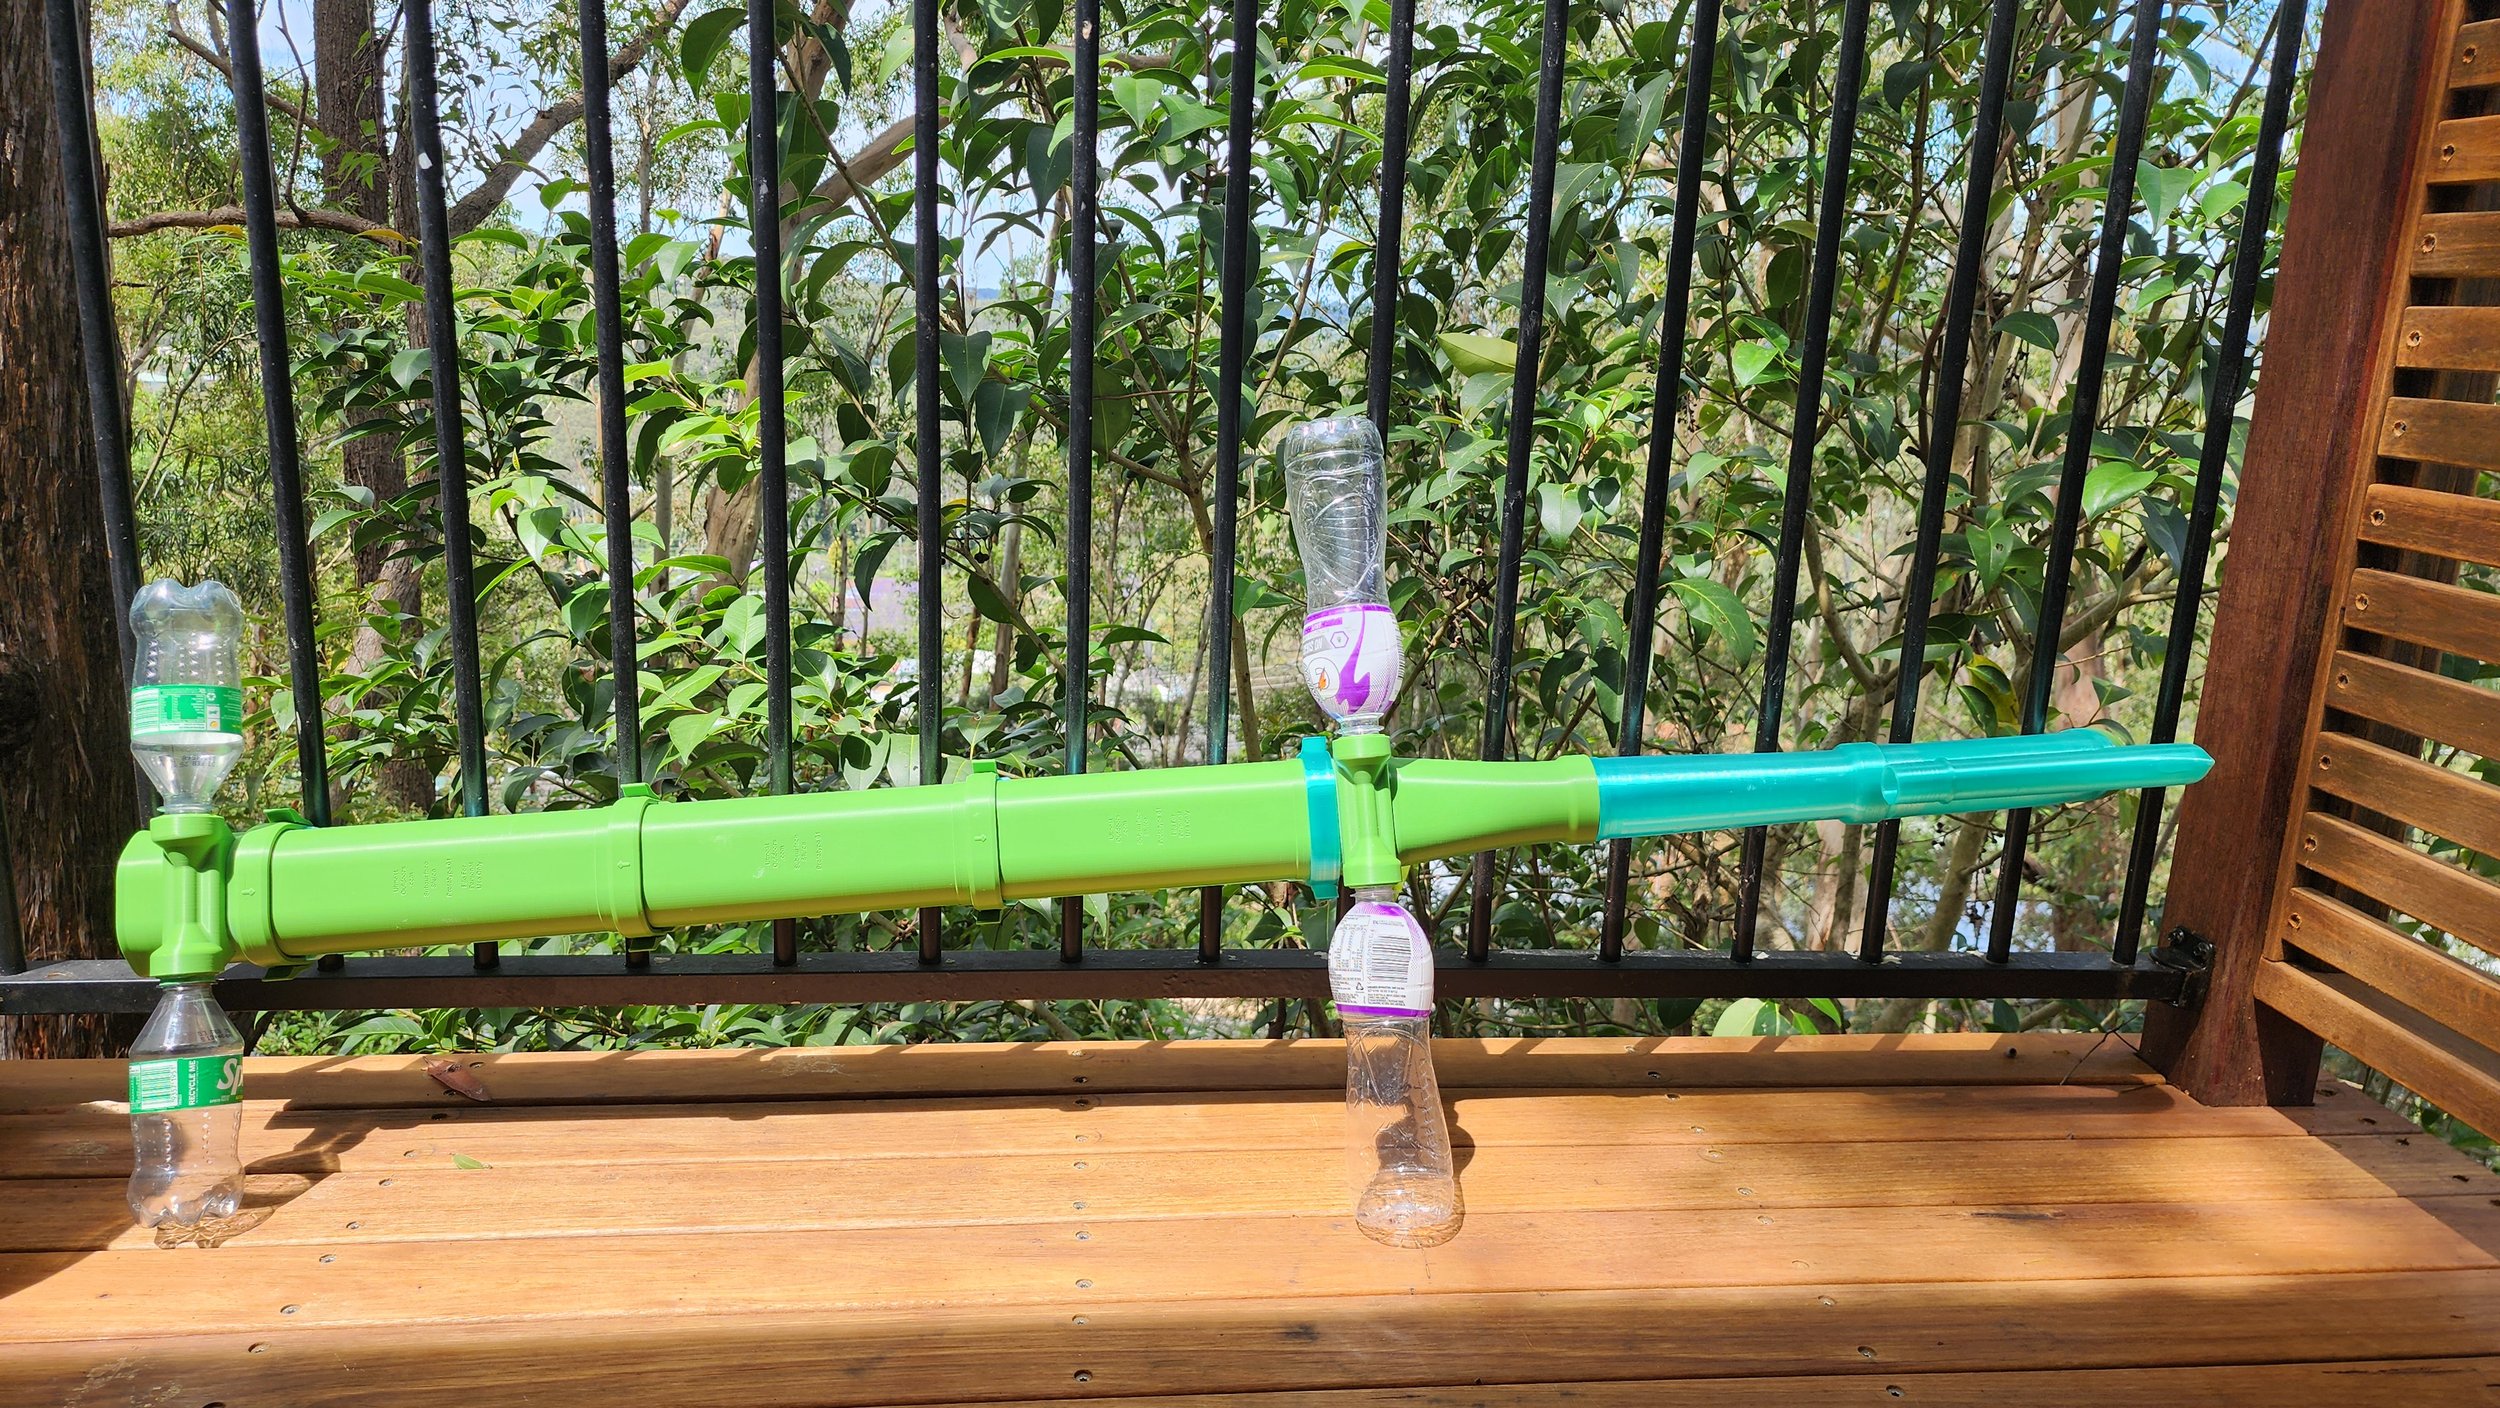 Image 3 of 7
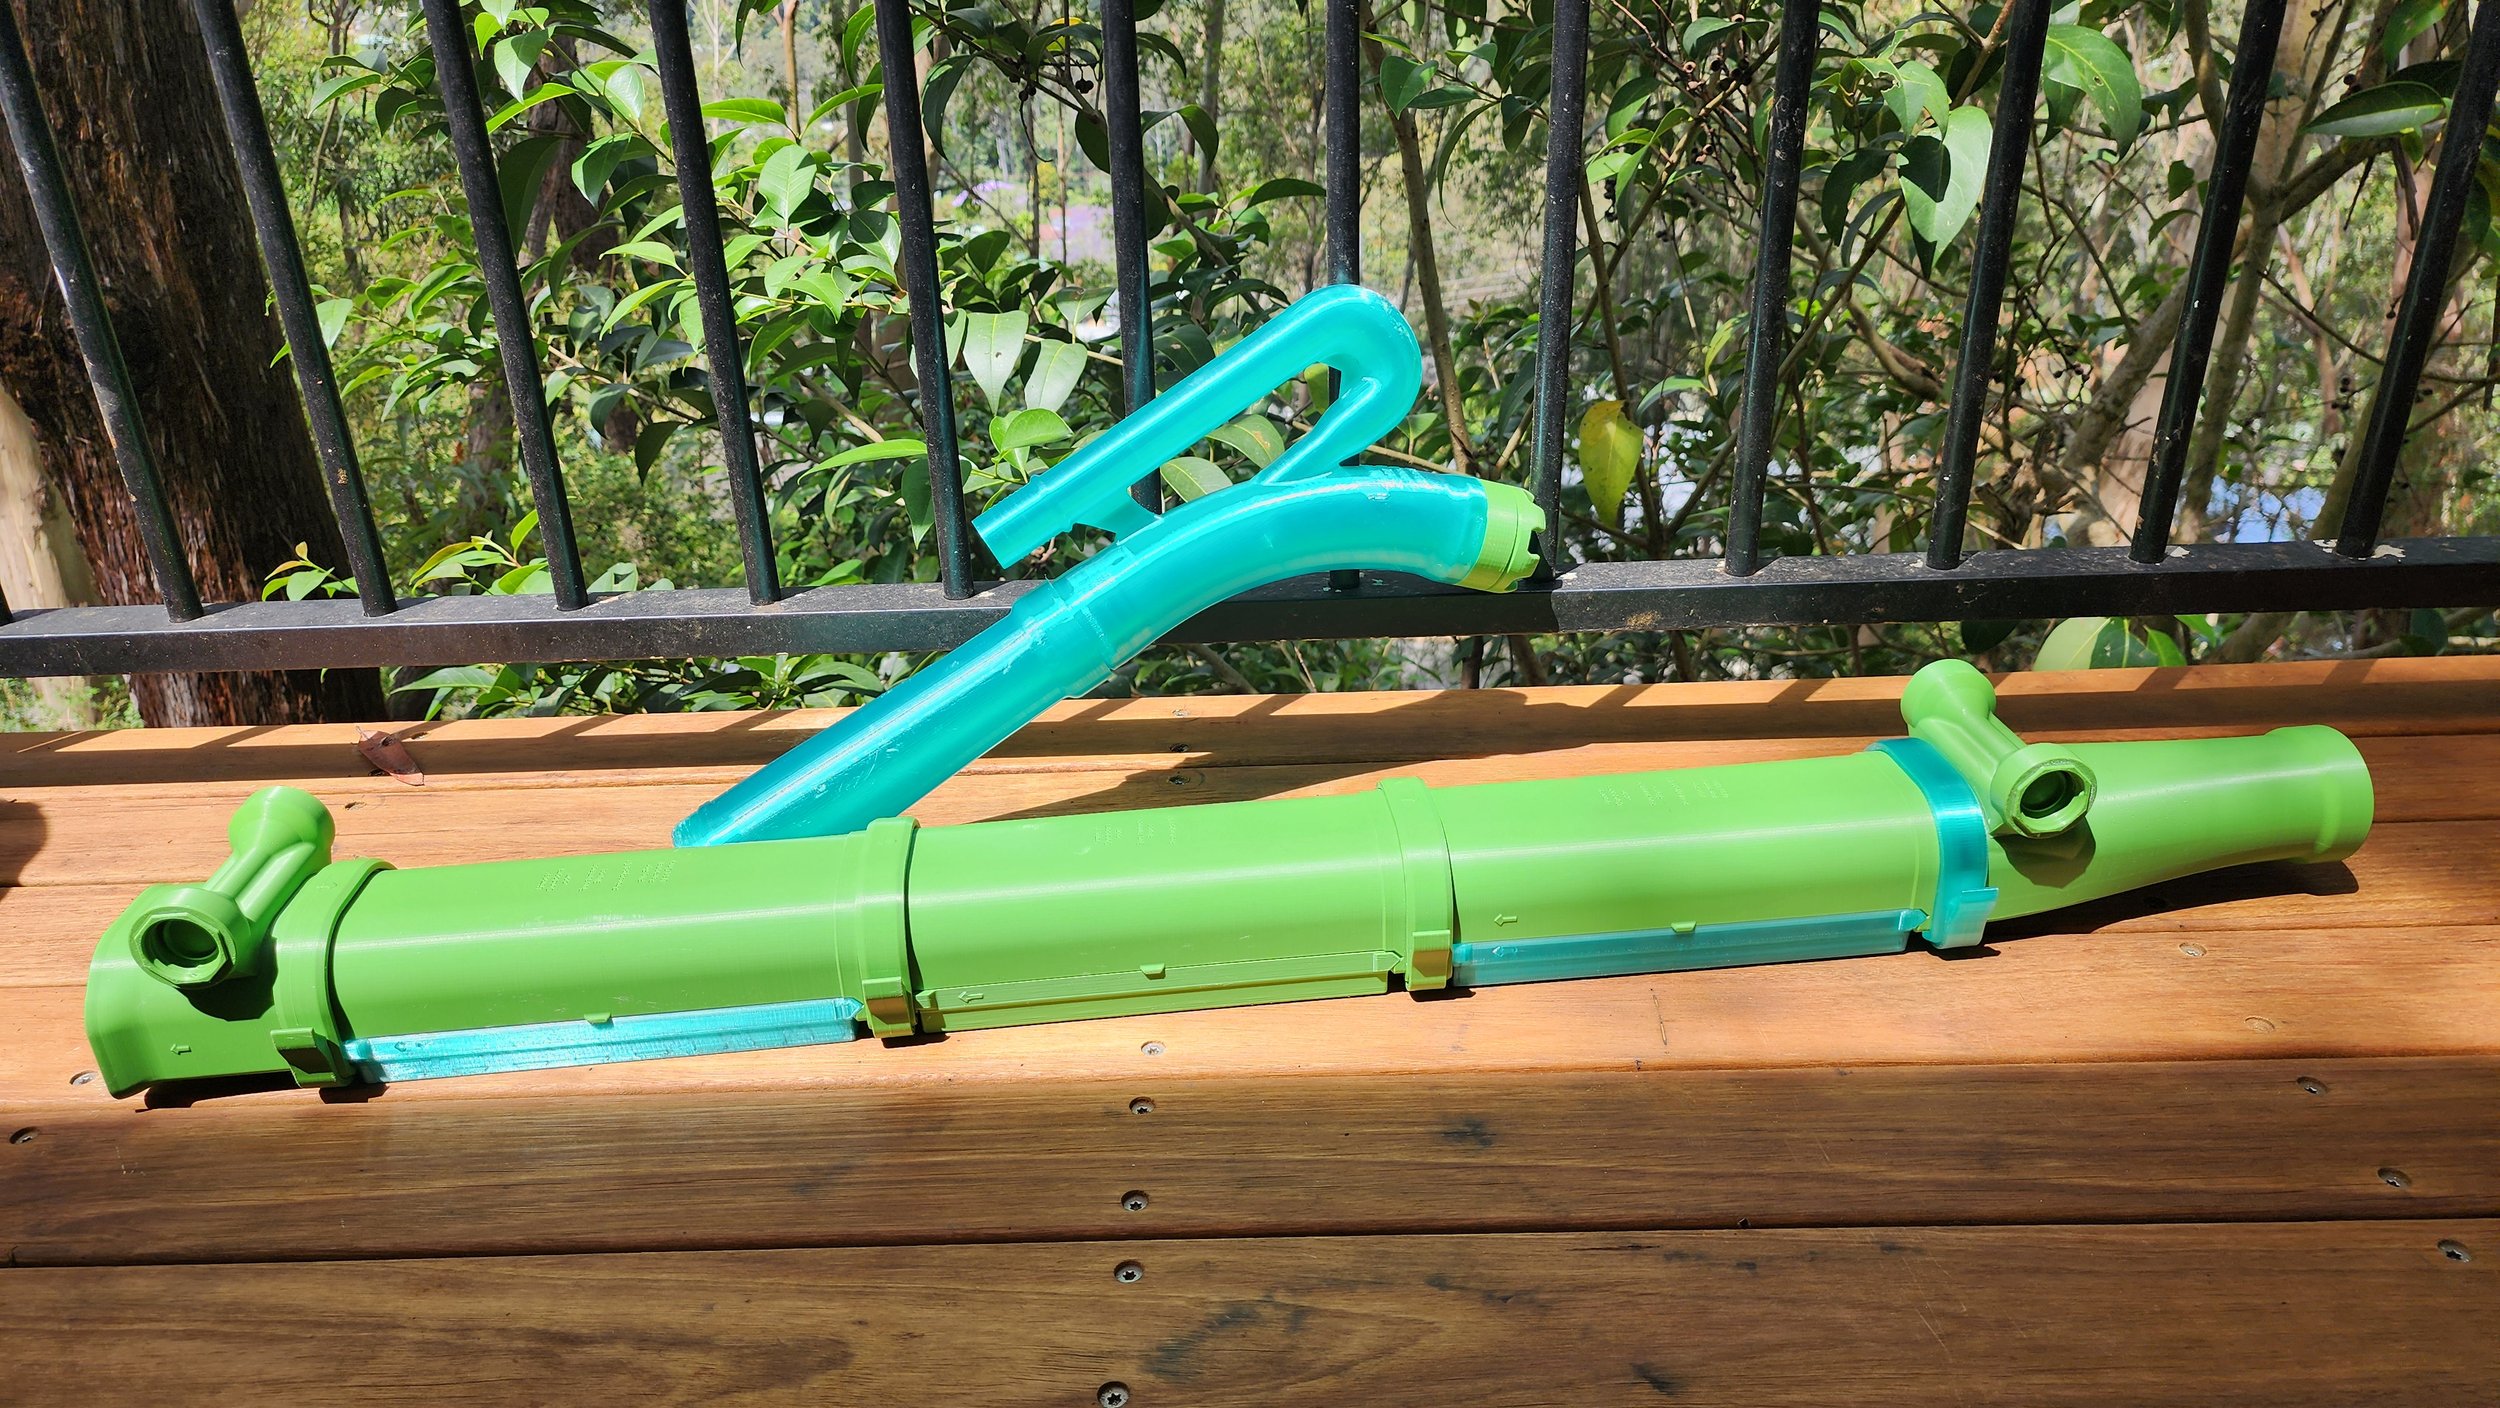 Image 4 of 7
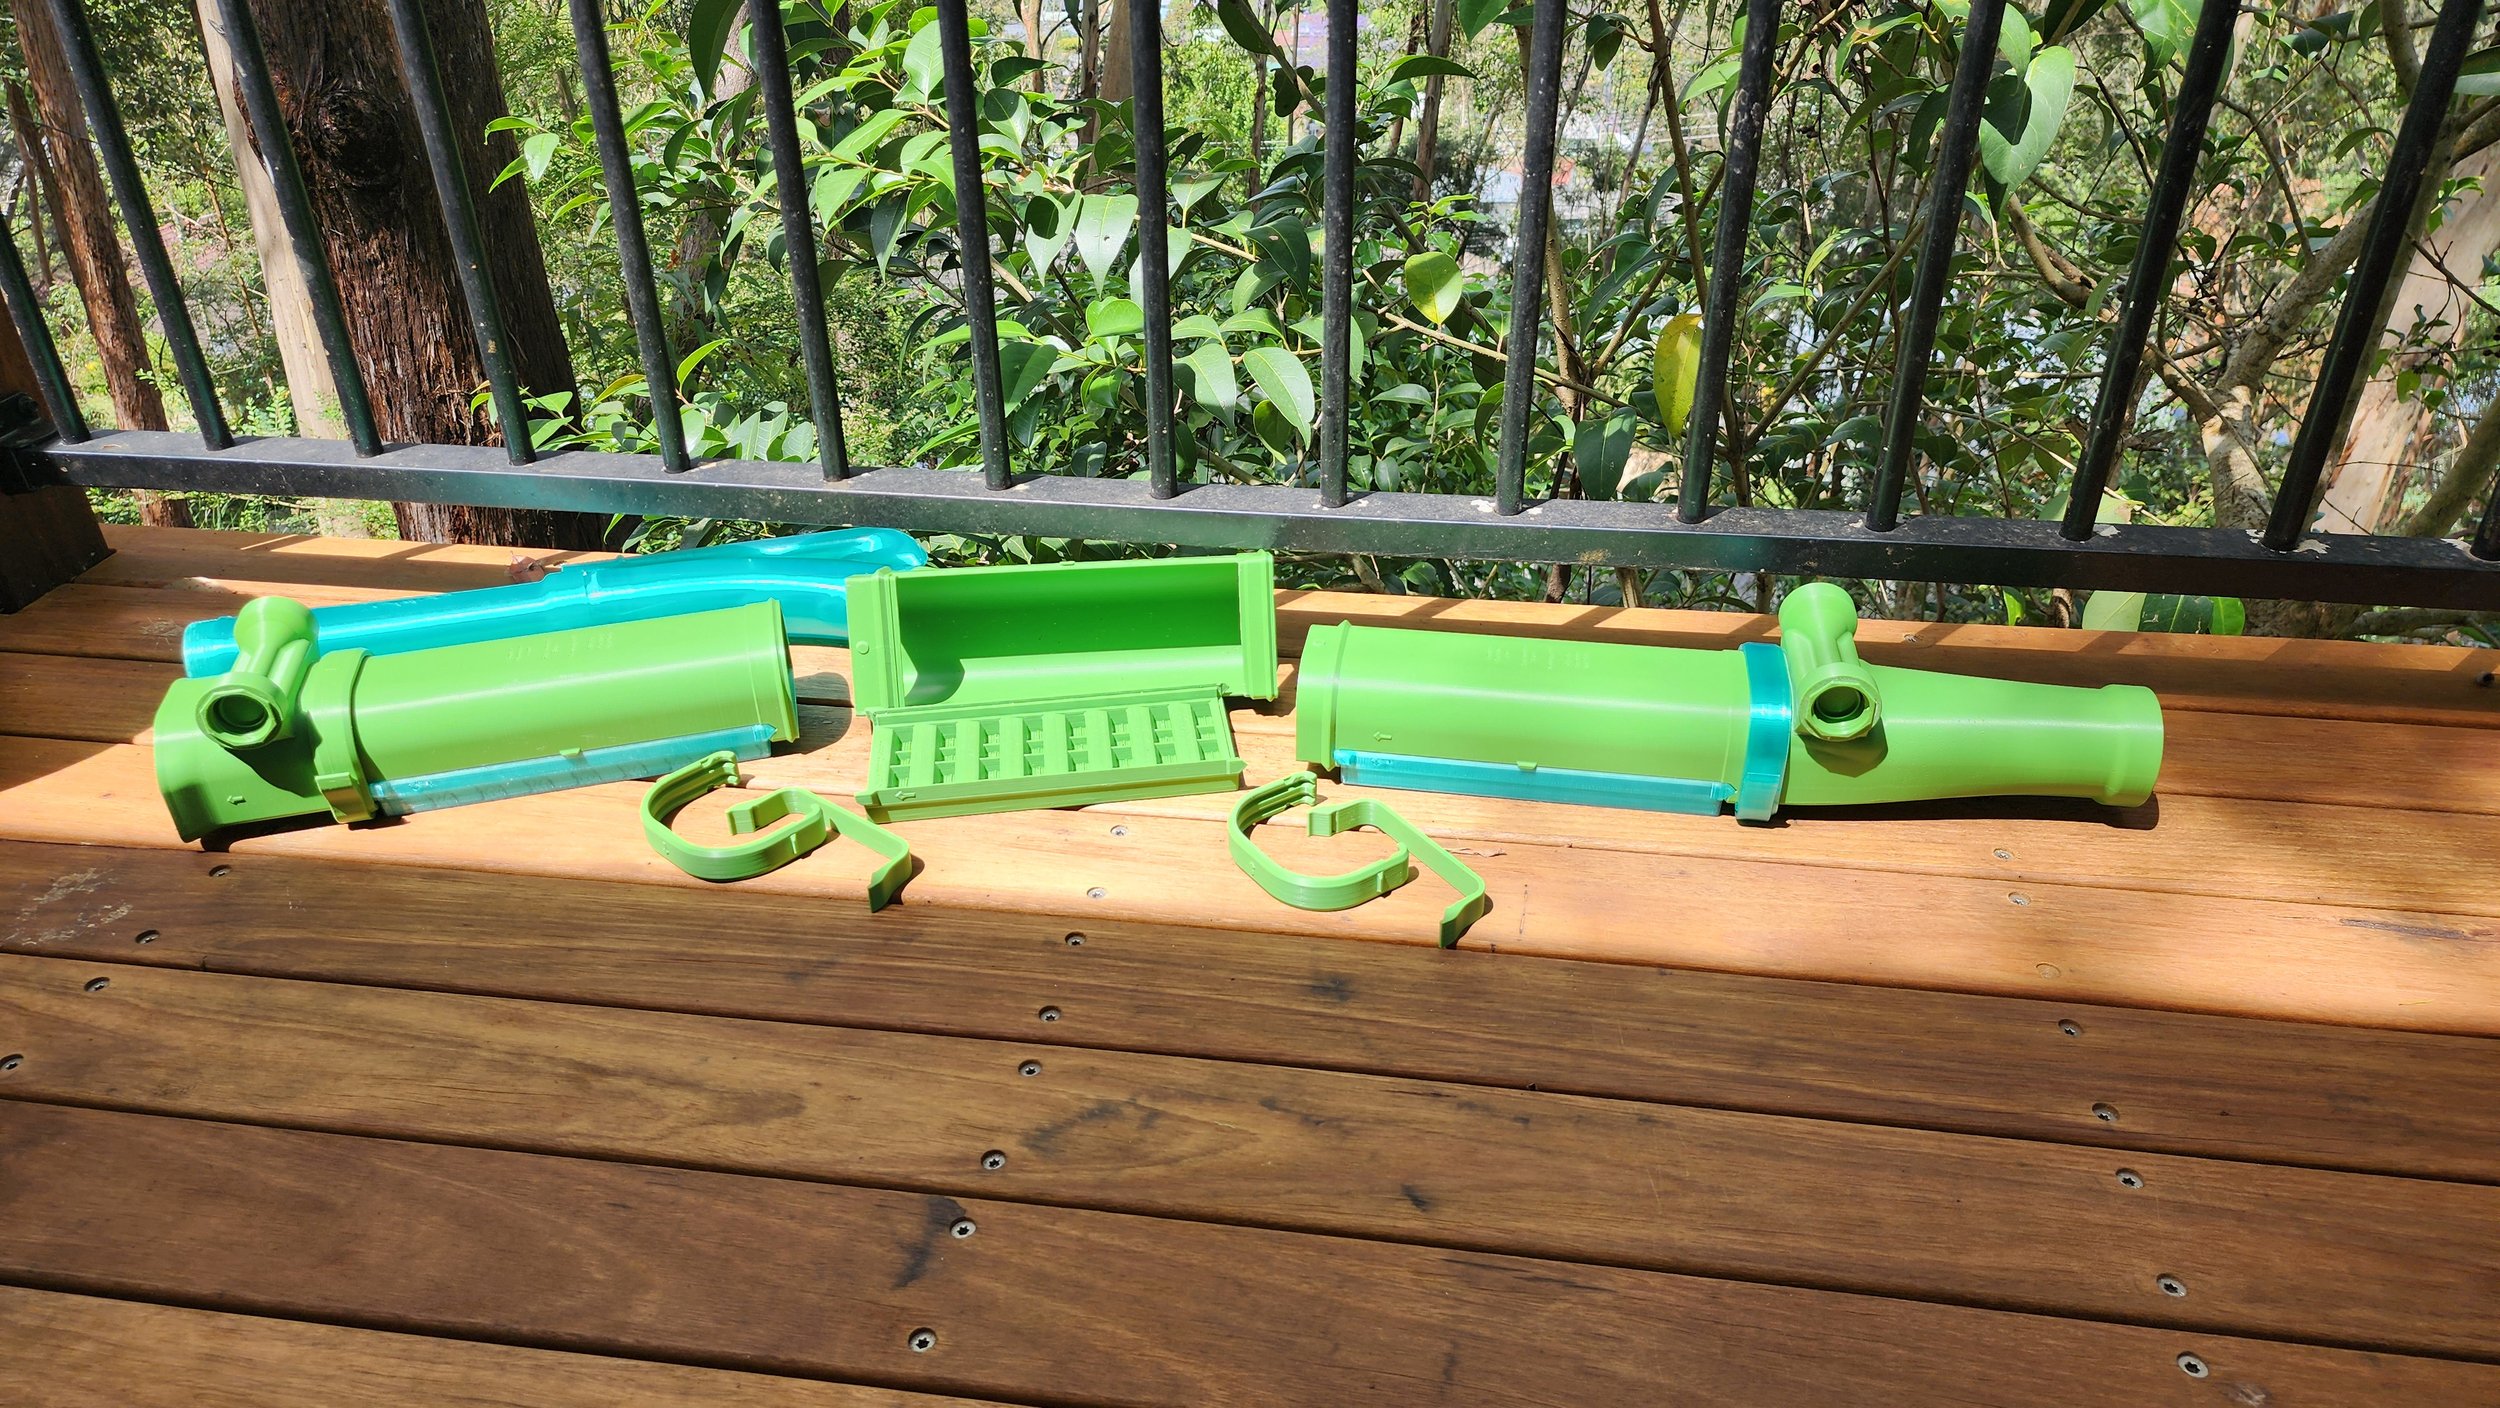 Image 5 of 7
 Image 6 of 7
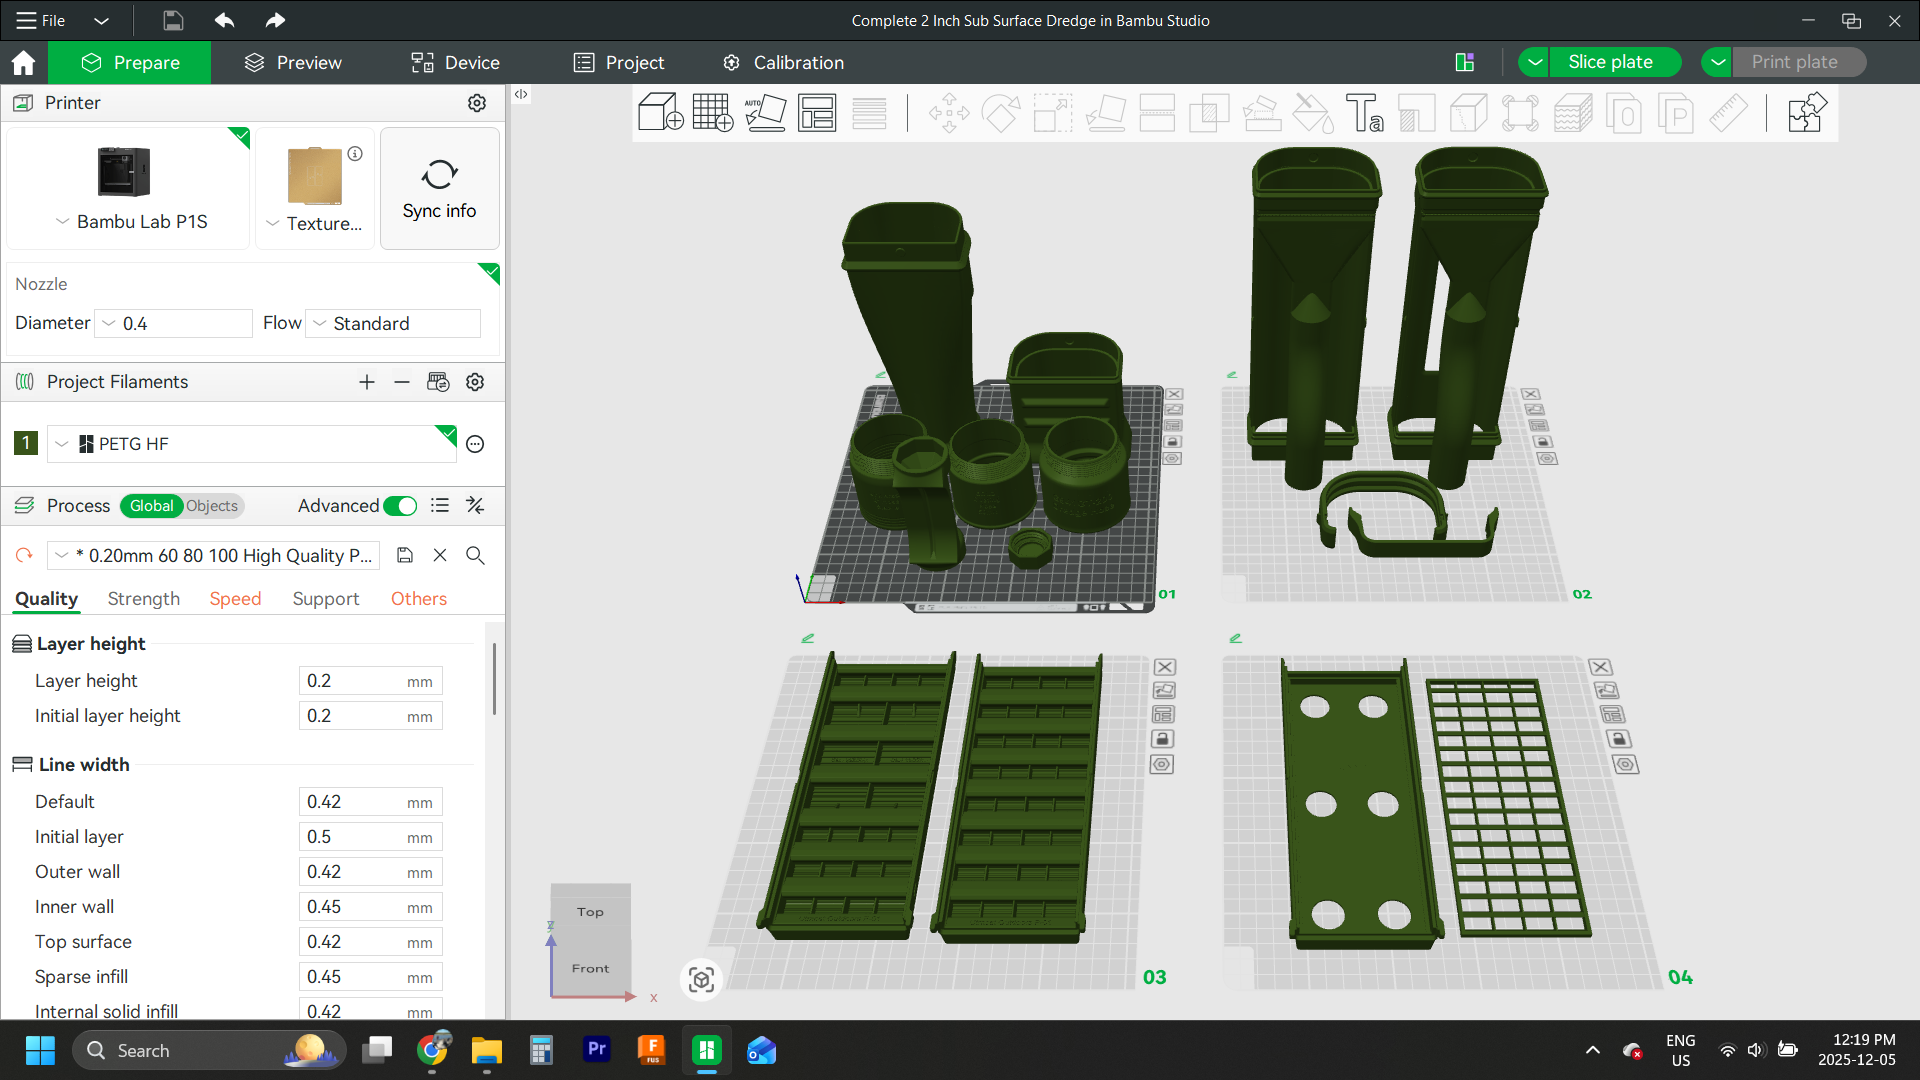 Image 7 of 7
Thanks for downloading this sub-surface 2" gold dredge file.
This is meant to pair with the 2" suction nozzle file purchased separately from UtmostOutdoors.com
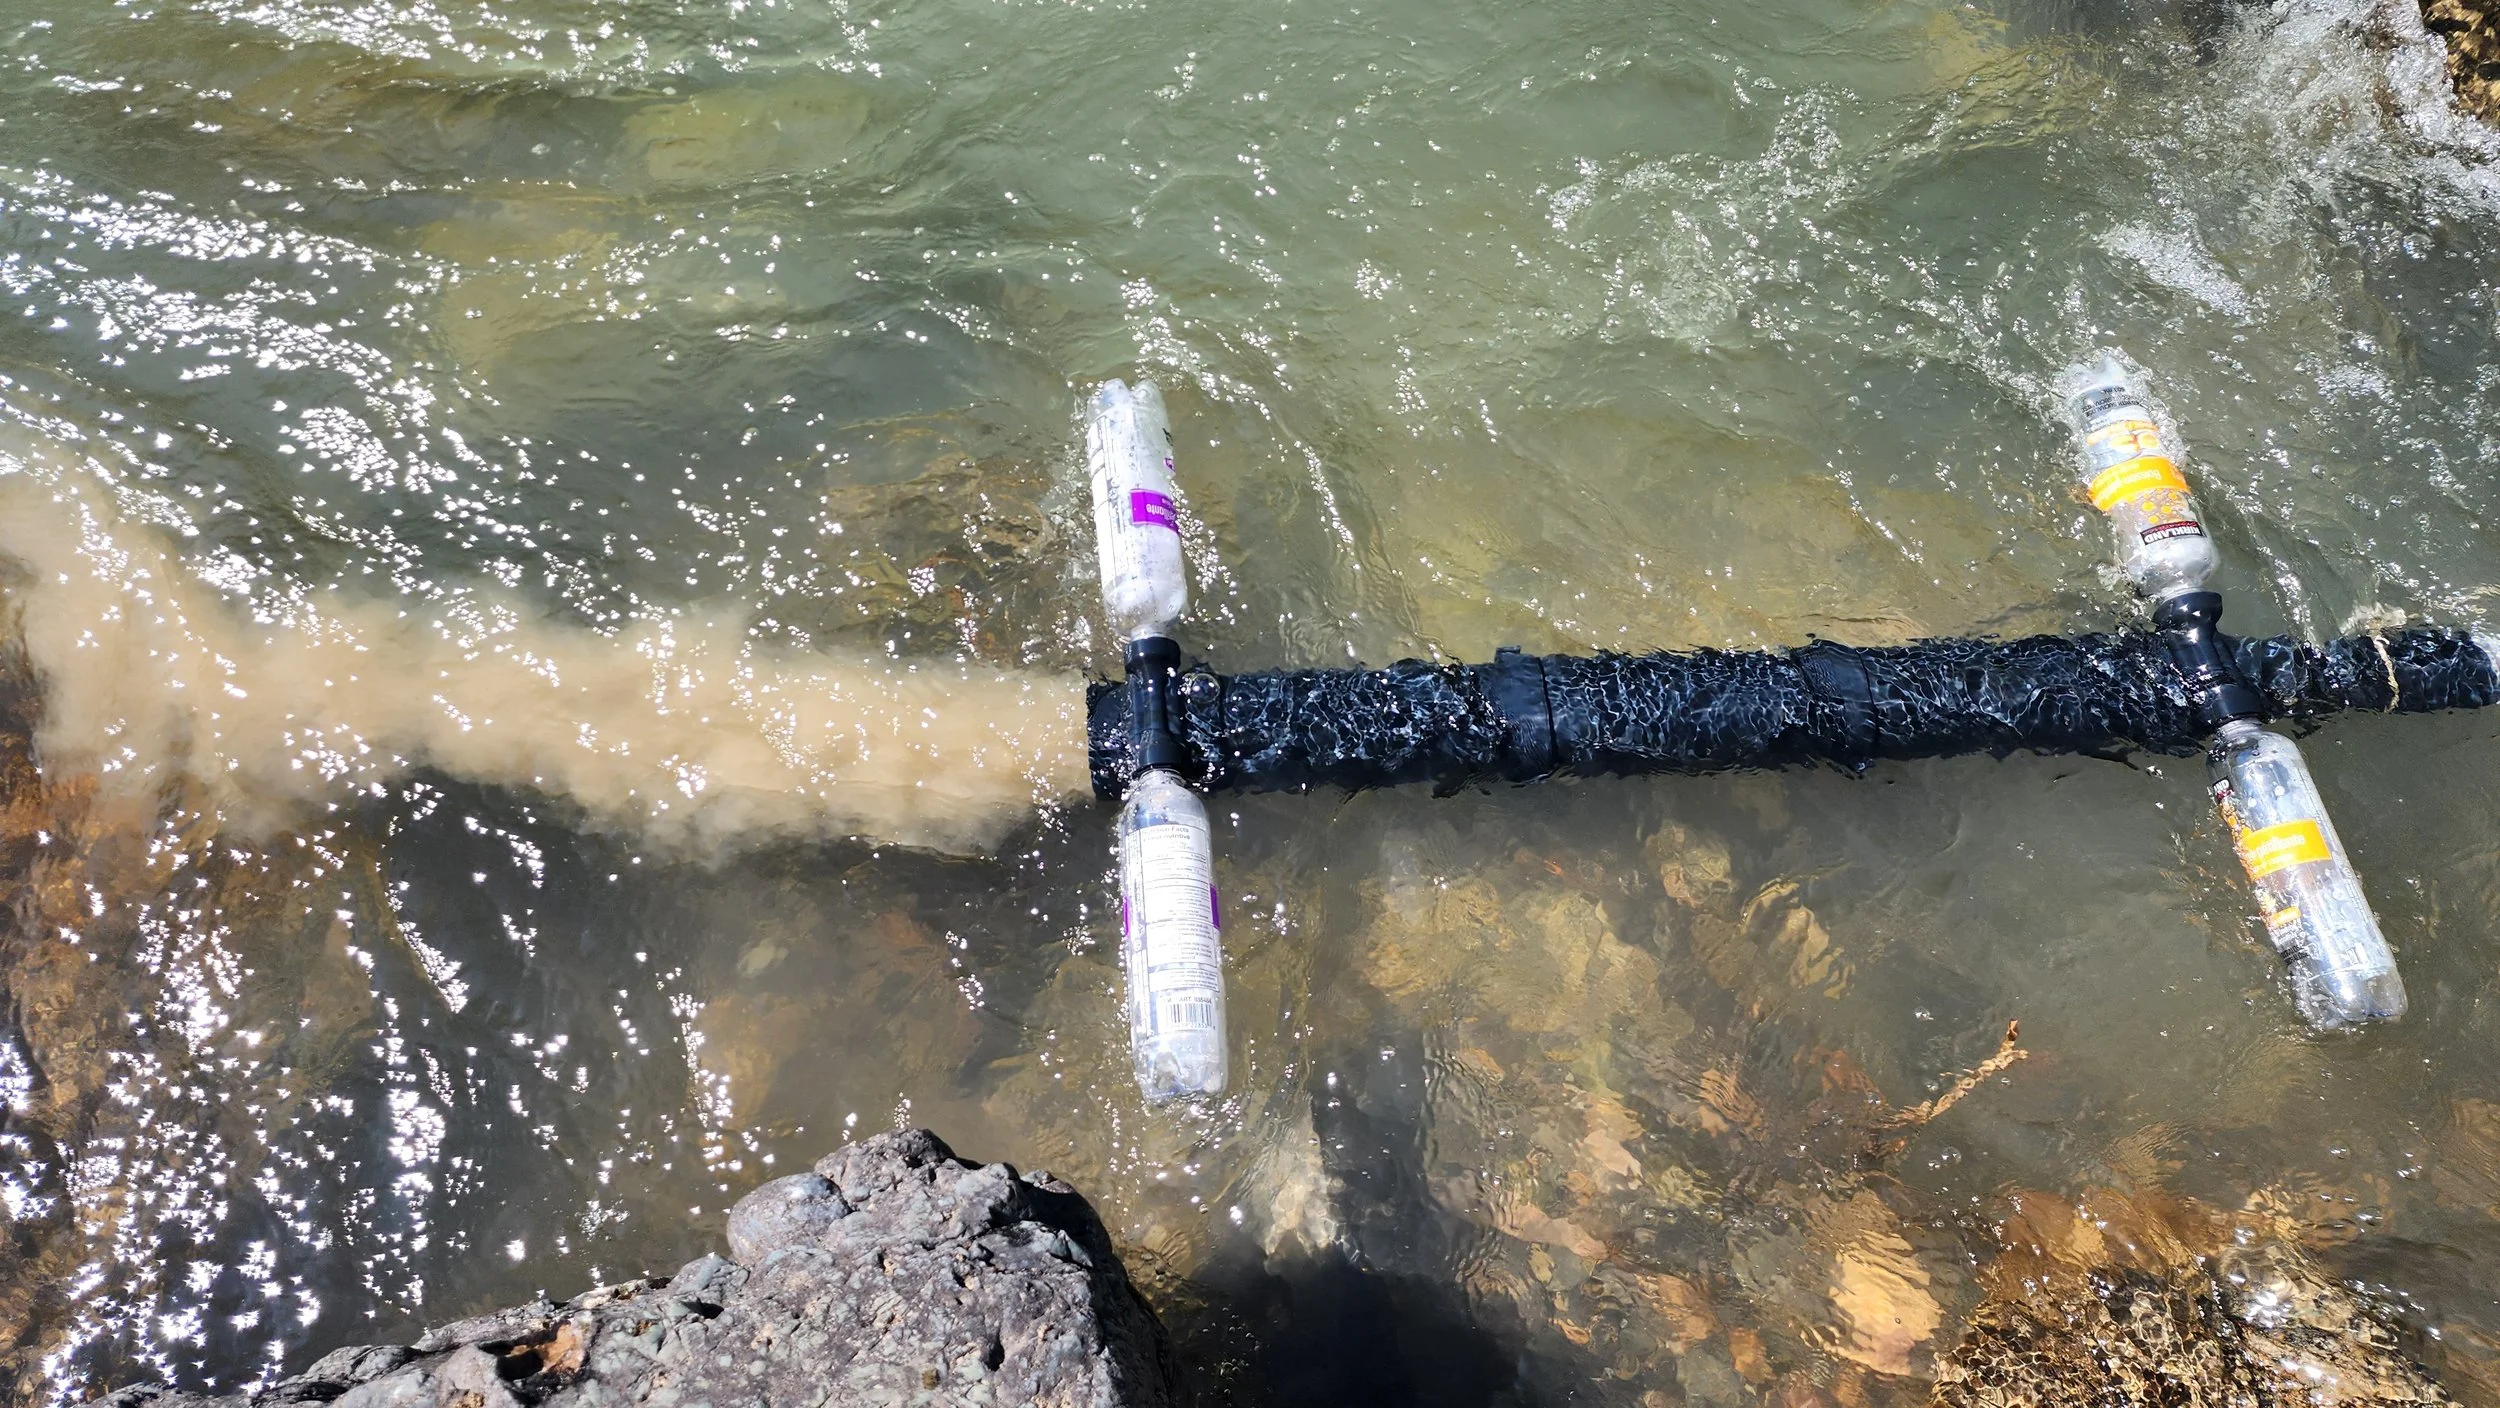
This sluice is designed to use any standard plastic bottle as a float. The dredge tube will sit just bellow the surface.
This was done to improve suction while running the dredge on an electric bilge pump. I recommend a 3000gph bilge pump or larger to power the system. A stock 4700 bilge pump is likely your best value per suction.
Depending on the Bilge pump used, the system should use between 160 and 200watts of power, which would make a 30-amp hour 12 volt battery last about 2 hours.
I use XT60 electrical connectors to run power to the bilge pump. At 12 volts, these can be connected directly under water without any parasitic loss of power. Even in salt water, there was only a 3.5 watt drain. I suggest using a bit of dielectric grease on the connection if running in salt water to prevent corrosion at the connection. Any connection capable of 20amps or greater will work here.
I use a 2” hose from Greenline hose and fittings in Canada sold as G941GT-200. It’s also sold by Kuriyama as Tigerflex WH-200. This file includes several hose adaptors as well as a universal thread on adaptor you should be able to glue onto the end of any hose that is the correct inside diameter of about 50mm (2”).
While a Sub-Surface gold dredge is very power efficient, they are not known for exceptional fine gold recovery. The riffle trays are designed to be easily 3D printed and have performed better than I expected for a sub-surface gold dredge, however further testing will be performed to refine their design. I suggest this unit will perform well in areas with coarser fine gold, but that true flour gold will require further development for high recovery percentages. I have included several matting profiles including a nugget trap segment in case you run into a large round nugget and don’t see it before it goes up the nozzle. I look forward to your feedback and will continue research and development towards flour gold in the coming months.
For the print, I have included all the recommended setting in a generic .3MF file. This should open any slicer software but I’m not familiar with how each brand of 3D printer will work. If you need to make your own changes to print settings, I simple recommend you follow these suggestions:
1 I like PETG-HF from bambu labs. It is a high flow PETG that seems to print well and is surprisingly durable. I choose slower print speeds than the standard settings to ensure consistently high quality and strength over the stock settings that can be very fast but less effective for structural parts. Stick to bellow 100mm/s print speeds to be safest, and I use 60mm/s outer walls for excellent threads. These numbers are conservative but should results in zero failures on the Bambu P1S I have been using to print these parts.
2 For the main suction tube segment, I have recently updated this with a designed support I made in Fusion 360. You should not require any supports for this print now, and the overhanging part should just bridge onto the included support. Once printed, it should break away and require just a small trim on the mating surface.
3 Any printable plastic will work for this machine. PLA is easy to print and strong, but I recommend using a light color to keep it from getting too hot in direct sunlight. PETG is a good material for practical prints and is supposed to have a higher impact resistance than PLA. ABS or ASA are also good choices if your printer is capable of them. ABS and ASA may not like printing in cooler climates. If ABS or ASA is chosen, you may need to insulate the print chamber if it’s cold outside of the printer for the most reliable prints. It could just work fine though, so give it a shot, just be aware of the risk of poor layer adhesion with these high temp materials without a warm chamber.
4 I designed these parts to be printed with 100% infill, except the riffle trays which just use 5 walls to save on plastic. You can print the parts with a standard 2 wall thickness and 15% infill if you just want to test it out and see how everything fits, but 3D prints aren’t known to be 100% watertight, so that is why I chose solid walls.
5 Required print volume for your printer is 250mm tall, and the length of the lay down parts is 215mm long.
Thanks again for your support and I wish you the best of luck in your subsurface gold dredge build!